Horizon Forbidden West PC Technology Discussion (Windows + Linux Benchmarks)

Horizon Forbidden West was one of the most visually impressive titles on the PlayStation 4 and PlayStation 5. Two years later, the same sentiment repeats on the PC. Despite no fancy raytracing features, Guerrila’s Decima Engine still produces a stunning game world and character rendering. I gushed enough about the visuals when I wrote my PS4 Pro and Burning Shores expansion reviews. Therefore, I will not elaborate further on this topic here. Instead, I will focus on the performance aspects. If you are interested in seeing a lot of screenshots, please read my reviews. The PC version is essentially the PS5 version, with a slightly higher level of detail in the distance and some PC-specific improvements, as Digital Foundry had discovered

The most significant benefit of this PC version is the “unlimited” performance that is unshackled from console hardware and the free choice of input peripherals. I played with a keyboard and a mouse because of RSI issues in my thumbs that operating a controller’s thumbsticks worsened. A mouse was also more accurate when aiming with the bow, but I would still have preferred a controller during traversal and combat. The proximity of all buttons to the fingers would have made coordinating the various skills and movement patterns much more effortless. Apart from that, PC’s stalwart input methods worked very well and did not hold me back much. I made up for what I lost in convenience with comfort and precision.

Unlike other modern releases that ate hardware for more or less good reasons, Horizon Forbidden West performed admirably. The YouTube channel eTeknix did enormous work testing 40 GPUs in three different resolutions. Nixxes did an excellent job making the game scalable, and Guerrilla’s initial work optimizing for the weaker consoles also paid off immensely. Even my former 3060 would have been enough to enjoy the Forbidden West with some help from DLSS upscaling.

Let The Numbers Do The Talking

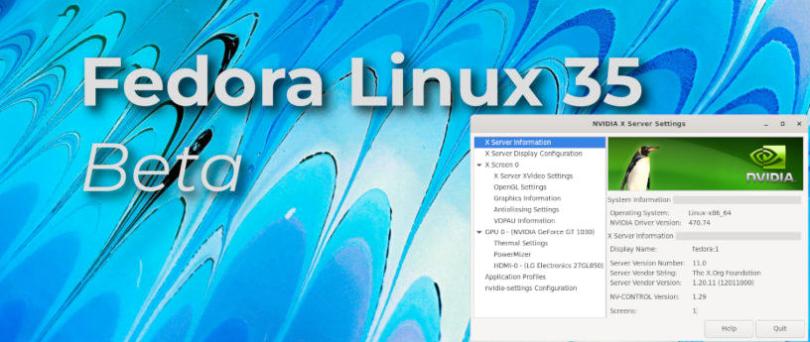
Speaking of hardware and performance, here’s what I measured on my system. It is a Ryzen 7600 with 32GB of DDR5 6000 MT/s memory and an AMD Radeon 7900 XT. The Windows installation ran the game off a Samsung 980 Pro, while Linux had to make do with a Samsung 970 Evo.

I have results for two GPU settings on Windows. The “Default” setting lets the graphics card run as intended by the manufacturer, XFX. My “Tuned” profile slightly undervolts the chip, dials down the power target and maximum clock speed a little, and applies a custom fan curve to make the graphics card bearable under full load.

I recorded the performance in and around Plainsong, one of the larger settlements in the game. This three-minute recording shows my benchmark sequence.


Average FPS1% Low FPSGPU Usage %CPU Usage %
Windows Default


Very High101.086.499.164.2
High113.192.998.365.9
Windows Tuned


Very High109.090.699.063.0
High110.790.298.267.7
Linux Gnome Wayland


Very High102.155.797.949.3
High106.957.597.649.8
Linux Gnome Xorg


Very High100.854.598.147.5
Linux KDE Wayland


Very High101.354.798.248.3

As the numbers show, Linux’s average performance is similar to Windows 11. Unfortunately, this is only half of the story. Staying with the Windows results for a second, the average and 1% lows are very close, highlighting the game’s incredible performance profile.

What I found most curious was the discrepancy between the Default and Tuned GPU profiles using the Very High graphics preset. For some reason, the Tuned profile performed much closer to the High graphics preset in both situations. I verified the results, and the only explanation I can come up with is that the improved efficiency resulting from my tuning allowed for higher sustained clock speeds when under high load. This brought the FPS numbers closer to the lower-quality preset, indicating that the CPU may now be the limit. It was not, however. Lowering the resolution to 1080p yielded more of them frames per second.


Average FPS1% Low FPSGPU Usage %CPU Usage %
Windows Tuned


High131.2104.394.275.7

So… still a mystery.

Linux is a different story, though. At the time of testing, Kernel 6.8.4 and version 1.1.47.0 of Horizon Forbidden West were current. The averages look amazing, but the 1% minimum numbers reflect how the game felt to play. Roaming through the Forbidden West was very choppy and reminiscent of the worst examples of Unreal Engine’s traversal stutter. The combat ran perfectly without hitching, and I suspect the issue was not the raw performance. For some reason, streaming the game world did poorly on Linux. I found the same performance profile in Starfield, which, admittedly, really had its own performance issues. The averages were great, but the 1%-low numbers were dwarfed by the Windows result. Horizon’s problems may stem from Nixxes’ implementation of Direct Storage, although this technology is available on Linux. Limiting the framerate to 60 to give the CPU more time for other things did not change the outcome. I do not think the slower SSD is to blame, as loading the game from the desktop is no slower than on Windows. After all, the PS4 Pro with a SATA SSD also did not have issues.

Is there a CPU configuration issue on Linux that prevents it from delivering its full performance? Mangohud’s logs say the Kernel utilizes the “powersave” CPU governor. But how could it manage the high frame rates if it really saves power? What is noticeable is the lower CPU utilization on Linux. Is that a side-effect of the Proton emulation layer?

This behavior was already annoying at higher VRR frame rates. When I tested the game on my 4K TV, every dip under 60 was exacerbated by how Vsync works, severely impairing the enjoyment of the game. On Windows, 4k60 was as smooth as 60 fps can be. On the plus side, Windows and Linux output a proper surround sound mix when connected to my AV receiver. I loved to hear that.

Lastly, I must give proper kudos to Nixxes for implementing one of the fastest game launches ever. Until now, I considered Kena Bridge of Spirits to be exemplary in this aspect. Horizon Forbidden West was even quicker. The game allowed me to skip every intro movie and logo on launch with a single press of the Escape button. Immediately after, the main screen showed up, and I could continue with my last saved state by pressing Space. Because of the insanely short loading times, I was back in the game, ready to play in just a few seconds. That was true for Windows and Linux.

Famous Last Words

This YouTube recording, which I made for reference, provides an extended look at Linux performance. The video does not contain commentary and only consists of regular gameplay with Mangohud open all the time. The frequent spikes on the frame-time graph convey the experience when playing. The recording is relatively choppy overall, but that likely is a byproduct of having Vsync disabled.

While Linux gaming has become more accessible since the Steam Deck launched, I still cannot entirely replace Windows. There’s always the one game that does not provide a silky-smooth experience. This is only true for some titles, of course. However, everything I tested since quietly resurrecting my Linux experiment delivered imperfect performance.

But, as I certainly already said in my Starfield Technology Discussion, a more powerful processor may reduce this effect 🤷.

I hope this was informative.

Thank you for reading.

Starfield Technology Discussion (Windows & Linux Benchmarks)

In my game reviews, I usually include a section I call “The Nerdy Bits” to examine a game’s technology. I have decided to separate this content from the game review to keep the size manageable. My Marvel’s Midnight Suns review showed me how an expansive technology section can inflate the blog post and maybe even distract from discussing the gameplay, the content, and the story, or potentially deter and intimidate readers because of the total length.

(This blog post is dangerously close to 3000 words 😉.)

I firmly believe that technology is a crucial aspect of a video game. Still, sometimes, I can get carried away and focus too much on it. Other people may not be as interested in that or as curious as I am, and they prefer an overview of the gameplay and a brief summary of the visual fidelity.

For me, a lousy running game can break the immersion. Take Elden Ring on the PlayStation 5, for example. My sister bought the game and thinks it runs fine, like many others who believe it to be the greatest thing since sliced bread. I took a 10-second look, turned the camera around one time, and concluded it ran like crap, and I did not want to play this way. Playing for ten to fifteen more minutes solidified this initial perception. This technology discussion is for gamers like me who are also interested in the technical aspects of a video game and base their purchasing decisions on that.

With this explanation out of the way, let me discuss what I think of Starfield’s technology. I will touch on the art style, the visual fidelity and technology, audio, and performance on Windows and Linux.

Please note that this is not a Digital Foundry-level inspection. For that, click here and here.

Read More »

How To Execute PowerShell And Bash Scripts In Terraform

The first thing to know is what Terraform expects of the scripts it executes. It does not work with regular command line parameters and return codes. Instead, it passes a JSON structure via the script’s standard input (stdin) and expects a JSON structure on the standard output (stdout) stream.

The Terraform documentation already contains a working example with explanations for Bash scripts.

#!/bin/bash
set -e

eval "$(jq -r '@sh "FOO=\(.foo) BAZ=\(.baz)"')"

FOOBAZ="$FOO $BAZ"
jq -n --arg foobaz "$FOOBAZ" '{"foobaz":$foobaz}'

I will replicate this functionality for PowerShell on Windows and combine it with the OS detection from my other blog post.

The trick is handling the input. There is a specific way, since Terraform calls your script through PowerShell, something like this echo '{"key": "value"}' | powershell.exe script.ps1.

$json = [Console]::In.ReadLine() | ConvertFrom-Json

$foobaz = @{foobaz = "$($json.foo) $($json.baz)"}
Write-Output $foobaz | ConvertTo-Json

You access the C# Console class’ In property representing the standard input and read a line to get the data Terraform passes through PowerShell to the script. From there, it is all just regular PowerShell. The caveat is that you can no longer call your script as usual. If you want to test it on the command line, you must type the cumbersome command I have shown earlier.

echo '{"json": "object"}' | powershell.exe script.ps1

Depending on how often you work with PowerShell scripts, you may bump into its execution policy restrictions when Terraform attempts to run the script.

│ Error: External Program Execution Failed
│
│   with data.external.script,
│   on main.tf line 8, in data "external" "script":
│    8:   program = [
│    9:     local.shell_name, "${path.module}/${local.script_name}"
│   10:   ]
│
│ The data source received an unexpected error while attempting to execute the program.
│
│ Program: C:\Windows\System32\WindowsPowerShell\v1.0\powershell.exe
│ Error Message: ./ps-script.ps1 : File
│ C:\Apps\Terraform-Run-PowerShell-And-Bash-Scripts\ps-script.ps1
│ cannot be loaded because running scripts is disabled on this system. For more information, see
│ about_Execution_Policies at https:/go.microsoft.com/fwlink/?LinkID=135170.
│ At line:1 char:1
│ + ./ps-script.ps1
│ + ~~~~~~~~~~~~~~~
│     + CategoryInfo          : SecurityError: (:) [], PSSecurityException
│     + FullyQualifiedErrorId : UnauthorizedAccess
│
│ State: exit status 1

You can solve this problem by adjusting the execution policy accordingly. The quick and dirty way is to allow all scripts as is the default on non-Windows PowerShell installations. Run the following as Administrator.

Set-ExecutionPolicy -ExecutionPolicy Unrestricted -Scope LocalMachine

This is good enough for testing and your own use. If you regularly execute scripts that are not your own, you should choose a narrower permission level or consider signing your scripts.

Another potential pitfall is the version of PowerShell in which you set the execution policy. I use PowerShell 7 by default but still encountered the error after applying the unrestricted policy. That is because the version executed by Terraform is 5. That is what Windows starts when you type powershell.exe in a terminal.

PowerShell 7.4.1
PS C:\Users\lober> Set-ExecutionPolicy -ExecutionPolicy Unrestricted -Scope LocalMachine
PS C:\Users\lober> Get-ExecutionPolicy
Unrestricted
PS C:\Users\lober> powershell
Windows PowerShell
Copyright (C) Microsoft Corporation. All rights reserved.

Install the latest PowerShell for new features and improvements! https://aka.ms/PSWindows

PS C:\Users\lober> Get-ExecutionPolicy
Restricted
PS C:\Users\lober> $PsVersionTable

Name                           Value
----                           -----
PSVersion                      5.1.22621.2506
PSEdition                      Desktop
PSCompatibleVersions           {1.0, 2.0, 3.0, 4.0...}
BuildVersion                   10.0.22621.2506
CLRVersion                     4.0.30319.42000
WSManStackVersion              3.0
PSRemotingProtocolVersion      2.3
SerializationVersion           1.1.0.1

Once you set the execution policy in the default PowerShell version, Terraform has no more issues.

A screenshot that shows the Windows Terminal output of the Terraform plan command.

And for completeness sake, here is the Linux output.

A screenshot that shows the Linux terminal output of the Terraform plan command.

You can find the source code on GitHub.

I hope this was useful.

Thank you for reading

How To Detect Windows Or Linux Operating System In Terraform

I have found that Terraform does not have constants or functions to determine the operating system it is running on. You can work around this limitation with some knowledge of the target platforms you are running on. The most common use case is discerning between Windows and Unix-based systems to execute shell scripts, for example.

Ideally, you do not have to do this, but sometimes, you, your colleagues, and your CI/CD pipeline do not utilize a homogeneous environment.

One almost 100% certain fact is that Windows addresses storage devices with drive letters. You can leverage this to detect a Windows host by checking the project’s root path and storing the result in a variable.

locals {
  is_windows = length(regexall("^[a-z]:", lower(abspath(path.root)))) > 0
}

output "absolute_path" {
    value = abspath(path.root)
}

output "operating_system" {
    value = local.is_windows ? "Windows" : "Linux"
}

The output values are for demonstration purposes only. All you need is the regex for potential drive letters and the absolute path of the directory. Any path would do, actually.

The regexall function returns a list of all matches, and if the path starts with a drive letter, the resulting list contains more than zero elements, which you can check with the length function.

You could also check for “/home” to detect a Linux-based system or “/Users” for a macOS computer. In those instances, the source code must always be located somewhere in a user’s directory during execution. That may not be the case in a CI/CD pipeline, so keep that in mind. Here is the result on Windows.

A screenshot that shows the Windows Terminal output of the Terraform plan command.

And here on Linux.

A screenshot that shows the Linux terminal output of the Terraform plan command.

You can find the source code on GitHub.

I hope this was useful.

Thank you for reading

Fedora 39 Change KDE Plasma To Gnome Shell

If you want to do the reverse operation and switch from Gnome Shell to KDE Plasma, I also have a blog post on that.

Replacing KDE Plasma on Fedora 39 requires only a couple of dnf and systemctl commands to convert the Fedora KDE spin into the Default Fedora Workstation with Gnome Shell. It might also work on earlier and later versions.

I have verified these steps on a fresh installation. Be sure to check the console output to avoid accidentally uninstalling any required software if you perform the desktop swap on a productive system.

Start with upgrading all packages. It is generally a good idea when performing such a massive system change.

sudo dnf upgrade

Next, you change the type of the Fedora installation. This is required because Fedora uses package groups and protected packages. You allow removing the KDE package groups by swapping them with the Gnome package groups.

$ sudo dnf swap fedora-release-identity-kde fedora-release-identity-workstation

Last metadata expiration check: 0:19:04 ago on Tue 02 Jan 2024 08:37:17 AM CET.
Dependencies resolved.
==============================================================================
 Package                              Architecture  Version  Repository  Size
==============================================================================
Installing:
 fedora-release-identity-workstation  noarch        39-30    fedora      11 k
Installing dependencies:
 fedora-release-workstation           noarch        39-30    fedora      8.2 k
Removing:
 fedora-release-identity-kde          noarch        39-34    @updates    1.9 k
Downgrading:
 fedora-release-common                noarch        39-30    fedora      18 k
 fedora-release-kde                   noarch        39-30    fedora      8.2 k

Transaction Summary
==============================================================================
Install    2 Packages
Remove     1 Package
Downgrade  2 Packages

Total download size: 45 k
Is this ok [y/N]:

And the second command.

$ sudo dnf swap fedora-release-kde fedora-release-workstation

Last metadata expiration check: 0:20:04 ago on Tue 02 Jan 2024 08:37:17 AM CET.
Package fedora-release-workstation-39-30.noarch is already installed.
Dependencies resolved.
==============================================================================
 Package                              Architecture  Version  Repository  Size
==============================================================================
Removing:
 fedora-release-kde                   noarch        39-30    @fedora     0  

Transaction Summary
==============================================================================
Remove  1 Package

Freed space: 0  
Is this ok [y/N]:

Next, fetch the Fedora Workstation packages and dump them on your storage drive (omitting output for brevity).

sudo dnf group install "Fedora Workstation"

Now that Gnome Shell packages are installed disable SDDM and enable the GDM login manager on boot.

sudo systemctl disable sddm
sudo systemctl enable gdm

At this point, I would log out or reboot and log into the Gnome Shell.

As the final step, you remove the KDE spin packages and the remaining stragglers.

sudo dnf group remove "KDE Plasma Workspaces"
sudo dnf remove *plasma*
sudo dnf remove kde-*
sudo dnf autoremove

Be careful not to mistype sudo dnf remove kde-*! If instruct dnf to remove kde*, it will catch more packages than you would like.

That is all there is to turn the Fedora KDE spin installation into the default Fedora Workstation with the Gnome Shell.

Read More »

Fedora 39 Change Gnome Shell To KDE Plasma

If you want to do the reverse operation and switch from KDE Plasma to the Gnome Shell, I also have a blog post on that.

Replacing the Gnome Shell on Fedora 39 requires only a couple of dnf and systemctl commands to convert the default Fedora Workstation into the KDE spin. It might also work on earlier and later versions.

I have verified these steps on a fresh installation. Be sure to check the console output to avoid accidentally uninstalling any required software if you perform the desktop swap on a productive system.

Start with upgrading all packages. It is generally a good idea when performing such a massive system change.

sudo dnf upgrade

Next, you change the type of the Fedora installation. This is required because Fedora uses package groups and protected packages. You allow removing the Gnome package groups by swapping them with the KDE package groups.

sudo dnf swap fedora-release-identity-workstation fedora-release-identity-kde

And the second command.

sudo dnf swap fedora-release-workstation fedora-release-kde

Next, fetch the KDE spin packages and dump them on your storage drive (omitting output for brevity).

sudo dnf group install "KDE Plasma Workspaces"

Now that KDE packages are installed disable GDM and enable the SDDM login manager on boot.

sudo systemctl disable gdm
sudo systemctl enable sddm

At this point, I would log out or reboot and log into the KDE session.

As the final step, you remove the Fedora Gnome packages and the remaining stragglers.

sudo dnf group remove "Fedora Workstation"
sudo dnf remove *gnome*
sudo dnf autoremove

That is all there is to turn the default Fedora Gnome installation into the Fedora KDE spin.

Read More »

Fedora Linux 35 Beta Install NVIDIA Driver (Works on Fedora 36 Too)

This is a quick one because the installation works in the same way as it did in Fedora 34.

First, I added the RPM Fusion repositories as described here.

sudo dnf install \
  https://download1.rpmfusion.org/free/fedora/rpmfusion-free-release-$(rpm -E %fedora).noarch.rpm
sudo dnf install \
  https://download1.rpmfusion.org/nonfree/fedora/rpmfusion-nonfree-release-$(rpm -E %fedora).noarch.rpm

Next, I installed the akmod-nvidia package like it is explained on this page.

sudo dnf update
sudo dnf install akmod-nvidia

One reboot later, the NVIDIA module was up and running.

$ lsmod | grep nvidia
nvidia_drm             69632  4
nvidia_modeset       1200128  8 nvidia_drm
nvidia              35332096  408 nvidia_modeset
drm_kms_helper        303104  1 nvidia_drm
drm                   630784  8 drm_kms_helper,nvidia,nvidia_drm

For completeness: my computer has an NVIDIA GT1030.

I hope this helped you, and thank you for reading.

KDE Plasma Remap Meta/Windows Key From App Launcher to KRunner

Sometimes I want to run applications that I do not have pinned to the quick-launch bar of my choice’s operating system/desktop environment. To do that, I am used to pressing the Windows/Meta Key, begin typing a few characters, and hit Enter. This is muscle memory and hard to get rid of. Although it does not matter which UI opens, I do not need the full-blown KDE Application Launcher, Gnome Shell, or Windows Start Menu. The amount of UI that pops up and changes while searching for the app is distracting.

Therefore, I wondered whether I could remap the Meta/Windows key from opening the Application Launcher to opening KRunner. And you can, but only on the command line.

Remove the key mapping from the Application Launcher.

kwriteconfig5 --file kwinrc --group ModifierOnlyShortcuts --key Meta ""

Open KRunner instead.

kwriteconfig5 --file kwinrc --group ModifierOnlyShortcuts --key Meta "org.kde.krunner,/App,,toggleDisplay"

Apply the changes to the current session.

qdbus org.kde.KWin /KWin reconfigure

I hope this helps you. Thank you for reading.

Qt6 QtCreator Crash After Install on Ubuntu 21.04

Hopping Linux distributions, I came to Ubuntu 21.04, and one of the first things I do is install Qt manually. I have described the process in a previous blog post on Linux Mint, and it is the same for Ubuntu. Except for a tiny detail. On Ubuntu, the bundled QtCreator immediately crashes and triggers a "Send Diagnostic" dialog.

$ /opt/Qt/Tools/QtCreator/bin/qtcreator
qt.qpa.plugin: Could not load the Qt platform plugin "xcb" in "" even though it was 
found. This application failed to start because no Qt platform plugin could be 
initialized. Reinstalling the application may fix this problem.

Available platform plugins are: eglfs, linuxfb, minimal, minimalegl, offscreen, vnc, 
xcb.

The fix is simple.

sudo apt install libxcb-xinerama0

I hope this helps. Thank you for reading.

Customize Nautilus Default Bookmarks

Nautilus is the default file manager in basically all Gnome-based distributions. I wonder why I cannot configure the default Bookmarks in the left panel through a context menu with that wide adoption. Is there no demand?

I managed to achieve my goal by editing two files. One is for the user, and the other one is a system file. I have not tried multiple user accounts, but I assume it affects everyone that uses the computer.

I wanted to remove "Desktop", "Public", "Templates", and "Video" because I never need that. What I ended up doing was to also change the location of "Documents", "Music", and "Pictures" to point to their respective OneDrive equivalents. That saves me from creating symbolic links, as I have explained in one of my OneDrive posts.

First, the user file.

vim ~/.config/user-dirs.dirs

#XDG_DESKTOP_DIR="$HOME/Desktop"
XDG_DOWNLOAD_DIR="$HOME/Downloads"
#XDG_TEMPLATES_DIR="$HOME/Templates"
#XDG_PUBLICSHARE_DIR="$HOME/Public"
XDG_DOCUMENTS_DIR="$HOME/OneDrive/Files"
XDG_MUSIC_DIR="$HOME/OneDrive/Music"
XDG_PICTURES_DIR="$HOME/OneDrive/Pictures"
#XDG_VIDEOS_DIR="$HOME/Videos"

Next, the system file. If you only remove entries from the user file, they will be added again the next time you log in. My tests showed that it is enough to customize the location in the user file. The other way around does not work, however.

sudo vim /etc/xdg/user-dirs.defaults

#DESKTOP=Desktop
DOWNLOAD=Downloads
#TEMPLATES=Templates
#PUBLICSHARE=Public
DOCUMENTS=Files
MUSIC=Music
PICTURES=Pictures
#VIDEOS=Videos
# Another alternative is:
#MUSIC=Documents/Music
#PICTURES=Documents/Pictures
#VIDEOS=Documents/Videos

Finally, you need to log out and log in again for this change to take effect.

I hope this helps. Thank you for reading.

OneDrive Sync On Linux Part 3, With abraunegg/onedrive As Daemon

In a previous blog post, I showed another way of syncing OneDrive folders on Linux as an alternative to using RCLONE. It was the Open-Source project “onedrive” by Github user “abraunegg” (a fork of an abandoned project by user “skilion”). One thing I was having trouble with was the installation as a daemon. I used an @reboot crontab workaround to achieve my goal instead. However, I was not satisfied, so I went back to the documentation to see if I missed something. And miss I did. To my defense, other steps I had tried are omitting a necessary detail required to make it work.

I have mentioned the installation in the other post, but I also left out a thing or two that I came across. That is why I will include the setup process again, this time in more detail, and refer you to the other blog post for configuration tips. That is the part I will skip here.

My test system is the same Fedora 34 distribution, and I have also tested the steps on Pop!_OS, which means it should work on the other Ubuntu derivates.

Read More »

OneDrive Sync On Linux Part 2, With abraunegg/onedrive

Edit: There is a part 3 that solves the daemon problem.

It has been about a year since my first blog post about syncing Microsoft’s OneDrive cloud storage on Linux. The last time around, I used RCLONE, which required a more hands-on approach. I have found a new tool that I think is better because it can sync automatically in the background without scripting or manually hacking. It is aptly called onedrive that you can find on Github.

Its name might suggest that Microsoft finally ported their Windows and Mac clients to Linux, but, unfortunately, that is not the case. I would still like to see this happen, and if there is ever a time for Microsoft to do it, it is probably now.

Let me briefly explain how I have installed and configured the onedrive tool to suit my needs. Thanks to good default values, it is straightforward, and you might not need any configuration at all.

(I wonder how I managed to not find this tool a year ago)

Read More »

OpenRGB – An RGB Software I Want to Use (It Runs on Linux!)

If you are in the market for anything gaming PC or gaming laptop related, chances are, you have come across the industry-wide trend of RGB illuminated hardware and peripherals. Everything is RGB, from the graphics card to the RAM, to your headset (because you can see the lights when you wear it 🙄), and many, many more. I am not against RGB lighting per se, but if you follow the industry as a PC hardware enthusiast, it is evident that in some aspects, this has gone too far.

Quick side note: after a rant about RGB software, I will show examples of using OpenRGB on Windows and Linux. If you are interested in only that, skip the rant and scroll to the bottom.

Read More »

Qt5 QtCreator Error on Linux: stddef.h: No such file or directory – Code model could not parse an included file

The following is an error that has shown itself every time I have installed the Qt5 framework and the QtCreator development environment on a Linux based machine. It never mattered which flavor of Linux; QtCreator always showed this error.

Warning: The code model could not parse an included file, which might lead to incorrect code completion and highlighting, for example. 

fatal error: 'stddef.h' file not found 
note: in file included from /home/rlo/Code/C++/WorkTracker2/WorkTracker2Shared/src/data/taskrepository.h:1: 
note: in file included from /home/rlo/Code/C++/WorkTracker2/WorkTracker2Shared/src/data/taskrepository.h:3: 
note: in file included from /usr/include/c++/9/optional:38: 
note: in file included from /usr/include/c++/9/stdexcept:38: 
note: in file included from /usr/include/c++/9/exception:143: 
note: in file included from /usr/include/c++/9/bits/exception_ptr.h:38: 

Although that message never caused any issues compiling the code, I found it rather annoying, and at some point, annoying enough to search for a solution.

As it turns out, this message appears when you have Clang libraries installed. QtCreator detects that and automatically uses Clang to parse the source code and provide inline error messages and code completion.

You can get rid of this error when you explicitly add the STL header files’ include-path to your project. In my case, I have added the following to my *.pro file.

unix {
    INCLUDEPATH += /usr/lib/gcc/x86_64-linux-gnu/9/include
}